I got a bit tired of paying £9.99 a month for Dropbox, so I explored cheaper options and after figuring out the inner workings, AWS S3 Glacier Deep Archive is the solution.
I’ve been meaning to write this up for a wee while now. I originally implemented this process back in mid-2019 and it’s been running well ever since – time came to write it up, so hopefully it could help you save a wee bit of cash too.
The obvious: backups are important
In the 20 years or so I’ve had access to a computer, I can think of three major data disasters that have occurred within the household. All three were a pain. We lost stuff, some photos, some documents. The third one was the most severe, as it lost our family photos from about 2006 to 2009. Since then, I’ve had at least two copies of things on two different media, but that’s still not enough for me.
I looked to Dropbox for an off-site backup, but I needed to jump on to the “Professional” plan for 1TB of storage (later doubled to 2TB) for £9.99 a month. My total storage usage is about 320GB, so I had the feeling of I was paying for more than what I really needed, and it irked me enough to develop this process.
My personal backup plan
I try to have at least three copies of my important information.
- “Live” copy on my primary home machine
- First “backup” copy is stored on an always attached Time Machine backup disk
- Second backup is stored in AWS S3 Glacier Deep Archive
There are some additional layers too:
- My own photos are stored in iCloud Photos, and some documents are stored in iCloud Drive
- I generally mirror my AWS storage usage to an external hard drive
It’s a bit manual, and definitely has some “administration effort”, but this plan protects me from the “worst case” scenarios – something like my house burning down, or being flooded. The online / off-site locations are the failsafe, theoretically the locations should be near enough 100% immune to any data loss risks.
Dropbox to S3 Glacier Deep Archive – how’s it done?
Setting up the AWS side of things isn’t too challenging at all. You will be giving up fancy web interfaces and desktop applications / integrations here, but if you want a place to simply dump data into now and then, this should do the trick.
What you’ll need to get started
- An AWS account hooked up to a credit card for monthly billing
- A web browser, and a decent upload speed on your internet connection
- Bonus, but not needed: a client application for interfacing with AWS S3
Also worth considering – if you needed access to the AWS data quickly (as in, say within a few hours), this storage location probably isn’t suitable for you. You could still use S3 Standard storage, but the cost benefit of AWS will end at about 340GB in S3 Standard (as a comparison, you could store up to 5TB in Glacier Deep Archive for less than £9.99/month)
What you gain, and what you lose
Using S3 Glacier Deep Archive will provide you with a very low cost cold storage solution. It’s not a Dropbox replacement. If you use features like links to shared folders, desktop sync, file previews, or file editing, using S3 Glacier Deep Archive won’t provide any replacement for these. You could use S3 standard storage class, but it will cost you more money.
Fair warning / disclaimer
This is a guide I’ve put together that works for me, it may not work for you. If it doesn’t work, and mess something up and lose stuff, or get billed your monthly mortgage amount – that’s a you problem, not a Callum problem. Do everything you see here at your own risk – and always, always, have another backup. Maybe set up AWS billing alarm (AWS docs here) to avoid any unexpected high bills.
With the Glacier Deep Archive storage class, you are committed to storing any object moved to the class for a minimum of 180 days.
In addition, this guide is fine for personal data – if you’re storing other data on other people / business data, etc – this guide really shouldn’t be followed as it probably will not meet some important GDPR compliance criteria. I’m sure you could make it compliant, but speak to an expert on the subject before doing this (or anything, really) with sensitive data.
Heads up on costs
There are some minor costs you may want to factor in to your planning for this. AWS does charge you a little for putting items into the service, and retrieving them again if you needed to – in most cases, your first-month charges are probably going to be less than your next month of Dropbox.
At time of writing, costing is as follows (in London / eu-west-2 region, and excluding taxes)
- Storing 100GB in S3 Glacier Deep Archive costs about $0.18 a month.
- Transferring 1000 files into the Glacier Deep Archive storage class costs $0.06.
- Restoring 100GB of data out of Glacier Deep Archive costs about $2.10 (important note, this retrieval moves the data to the S3 Standard storage class, which is about $2.30 a month per 100GB – you’ll want to get it off there quickly to avoid a larger bill).
Other regions may be cheaper (US ones in particular) but I like to keep my data in the UK.
Step one: create your S3 bucket
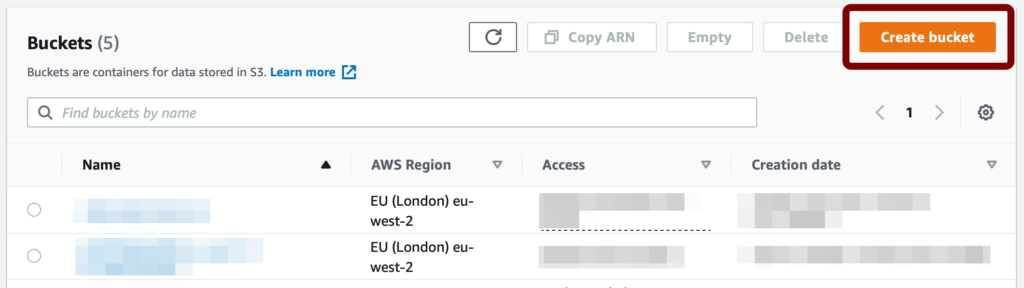
Log into the AWS console, and navigate to the S3 area. If you already have a bucket, you can skip this step.
In S3, press the orange “Create bucket” button in the upper-right:
On the next screen, supply a bucket name. This will identify your bucket, so make it meaningful or obvious. At this stage, you can also set your AWS region – I have mine in eu-west-2, but you can choose from almost all AWS regions here (costs will vary).
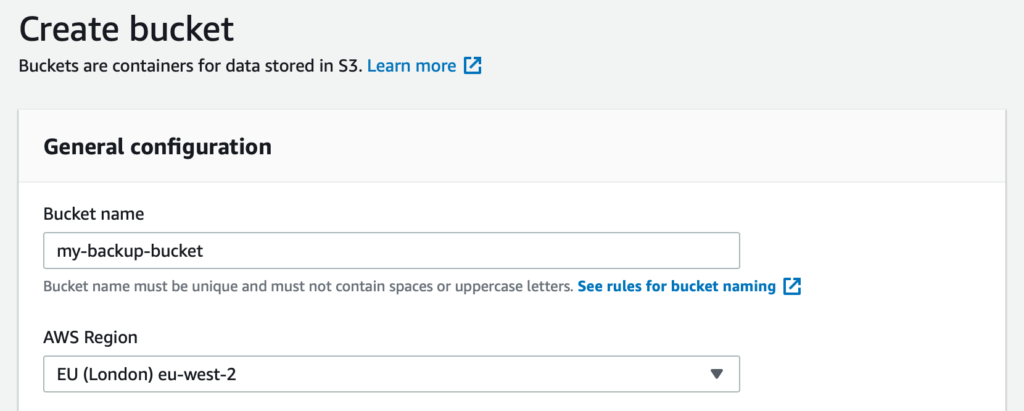
Once you have supplied a name and selected the region, you don’t need to touch any of the other settings:
- We’ll keep the bucket private (so no world / public access)
- We won’t use encryption (decrypting can be a bit of a pain – unless you need it and understand what you’re getting into, I recommend leaving it off)
- We probably don’t need versioning, but up to you. Note: versioning increases costs.
Scroll down to the bottom of the page and press the “Create bucket” button. This will provision your new S3 storage location for you, ready for data and some other configuration.
Step two: configure lifecycle rules
At this stage, I recommend creating a folder named “Glacier” inside your bucket. This gives you flexibility in the future to easily move items back into another S3 class if you want to (especially if you needed to recover data).
We can’t write directly to a Glacier Deep Archive storage location, so we need to create a “Lifecycle rule” that will automatically detect and move new files / folders to the storage class once a day.
AWS S3 storage classes have different availability options. S3 standard is basically instant, so useful if you want access to data immediately (like through a website for example). Other classes move it off “hot” storage into “cold” storage where it cannot be accessed immediately. The lowest class as of writing is Glacier Deep Archive which is the cheapest option.
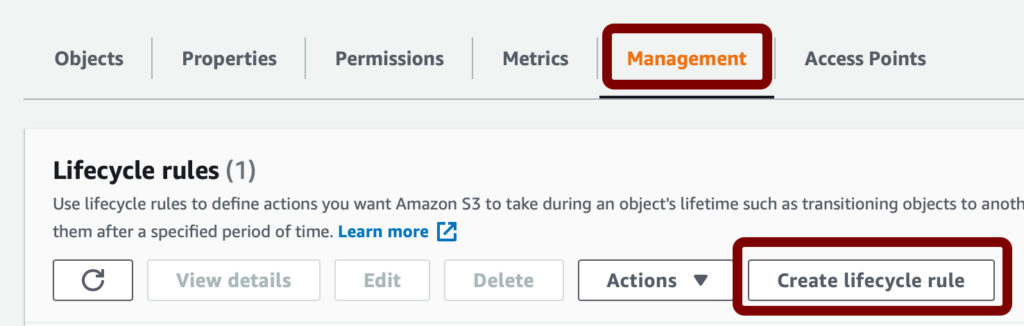
In the S3 dashboard, click on your newly created bucket, then locate the “Management” tab. Once in the management tab, locate the “Lifecycle rules” area and press the “Create lifecycle rule” button:
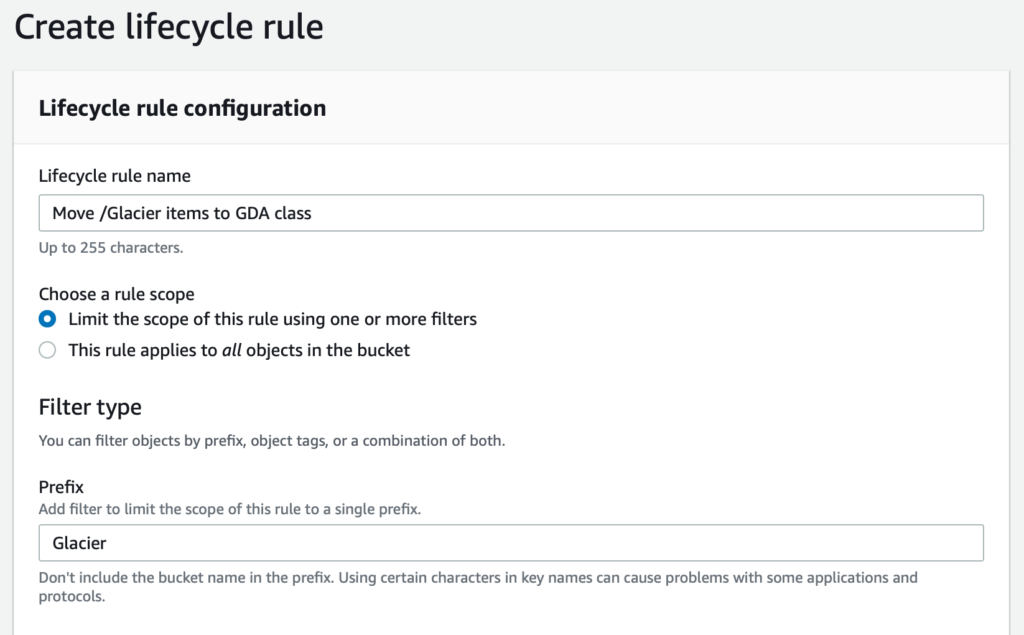
In the “Create lifecycle rule” screen, supply a name for your rule (I’ve called mine “Move /Glacier items to GDA class”. I’ve also set the “Choose a rule scope” setting to the filter one, rather than the all objects option. This lets us use the single /Glacier folder that we created previously.
Scroll down a little until you see the “Lifecycle rule actions” section. We need to choose the “Transition current versions of objects between storage classes” checkbox. This will display an additional box below, and we need to change the “Storage class transitions” setting from “Standard IA” to “Glacier Deep Archive”, and the “Days after object creation”, set this to “1”.

Scroll down a little further, you may see a red alert box as below:
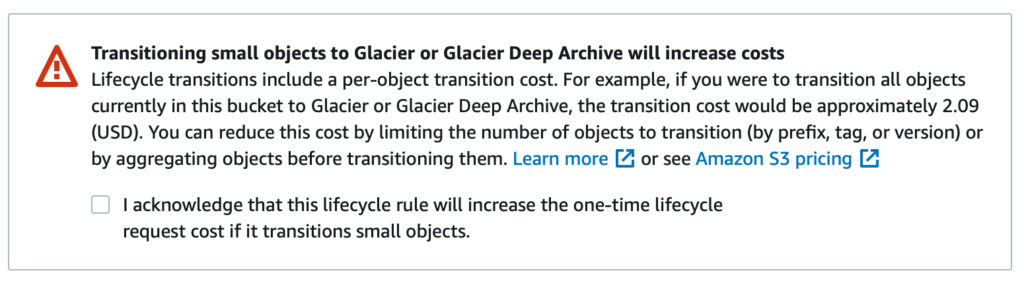
This is a warning about small objects being transitioned. AWS will bill you per object, so if you had several thousand files (even if they’re tiny), they will be billed. You can see an approximate cost for this to run against any data in the current filter, for me it would be $2.09 to move about 35,000 individual items. If you see this warning, you must press the “I acknowledge that this lifecycle…” checkbox.
Scroll all the way to the bottom and press the “Create rule” button.
Step three: upload your data
At this stage, your bucket is ready to accept data, and a lifecycle rule configured to move new data into the Glacier Deep Archive storage class. There are two easy ways to upload your data:
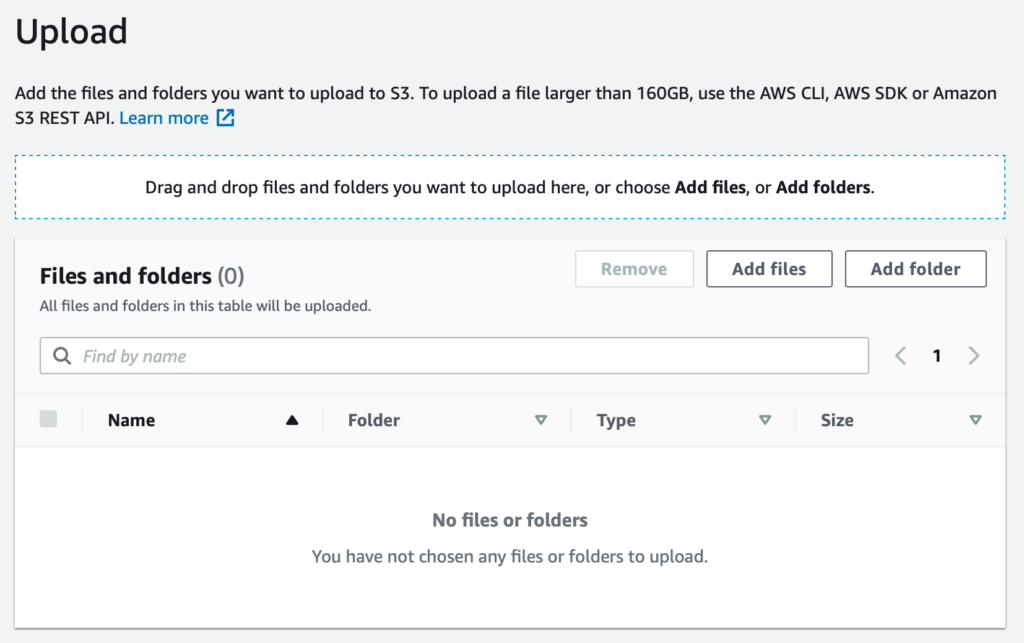
Upload using a web browser in the AWS S3 console
The S3 console has a handy “Upload” button, and you can add files / folders to upload from there. I don’t know how reliable it is for large transfers, but I imagine it’ll work great for small batches.
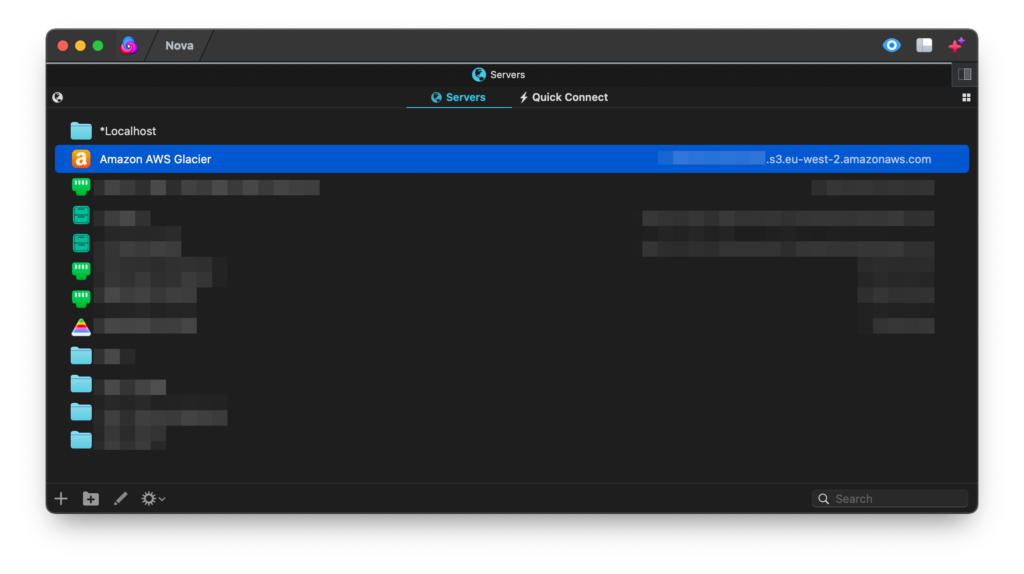
Upload using a client application
There are a few apps out there that will let you interface with AWS S3. On macOS, I would highly recommend using Panic’s Transmit or Nova applications – they both have native support for AWS S3 and a few other services too.
Buy Transmit and / or Nova on Panic’s website
To use one of these external applications, you’ll need to create an AWS user with an AWS Access Key set up, grant the “AmazonS3FullAccess” permission. You can do this through the IAM in the AWS console.
(Just a note: Panic didn’t pay me or give me anything to say nice things about their apps, they’re a great bunch of folks making amazing products that I’m happy to recommend.)
Step four: profit (or, well, save…?)
Now you’ve got your data in AWS, you can switch off your Dropbox subscription. My online backup costs are now about £10 a year, instead of £10 a month with Dropbox. There’s your Disney+ subscription justified.